

How to DIY Clean Your Aircon Safely — and When to Call a Technician
1. Introduction
A clean aircon runs better, uses less energy, smells nicer—and resists breakdowns. Doing some basic cleaning yourself saves cost and gives peace of mind. But push too far, and you risk damaging delicate parts or voiding warranties. In Singapore’s humid environment, balance is key. Here’s how to clean safely, and when to hand over to the professionals (hello, ACX).
2. Why Occasional DIY Matters (Especially in Singapore)
- High usage & humidity: Many homes run aircons 8–12 hours daily; condensation + dust means fast buildup.
- Cost & convenience: Frequent tech visits add up. Doing filter or drain cleaning yourself can stretch the gap between full services.
- Early detection: While cleaning, you may spot leaks, mold, or wiring issues before they worsen.
- But: DIY is not a substitute for full servicing. There are parts and risks you shouldn’t touch.
3. Safety First: Precautions You Must Take
Before you unscrew anything, here are non-negotiables:
- Turn off power completely: Use the circuit breaker or local isolator. Never work on live electrical parts.
- Wear protective gear: Gloves, safety glasses, mask (dust, mold spores) recommended. (islandbreezehvac.com)
- Use gentle, approved cleaning agents: Strong acids or caustic chemicals can corrode metals or damage coatings. (islandbreezehvac.com)
- Avoid bending fins: The evaporator/condenser fins are delicate. Don’t press hard or use brute force. (islandbreezehvac.com)
- Watch for refrigerant / gas lines: Never tamper with copper tubing or valves—risk of leak or injury.
- Be careful of falls or unstable positions: Indoor units can be in awkward spots. Don’t overreach or stand insecurely.
- Ventilate the room: If using cleaning sprays or dealing with mold, ensure airflow or open windows.
These precautions align with standard HVAC safety practices. (Crocker Refrigeration Heating & Air)
If at any step you feel unsure, pause and call a technician.
4. What You Can Safely DIY (Routine Tasks)
These are steps you can do yourself (with care) to keep your aircon healthy:
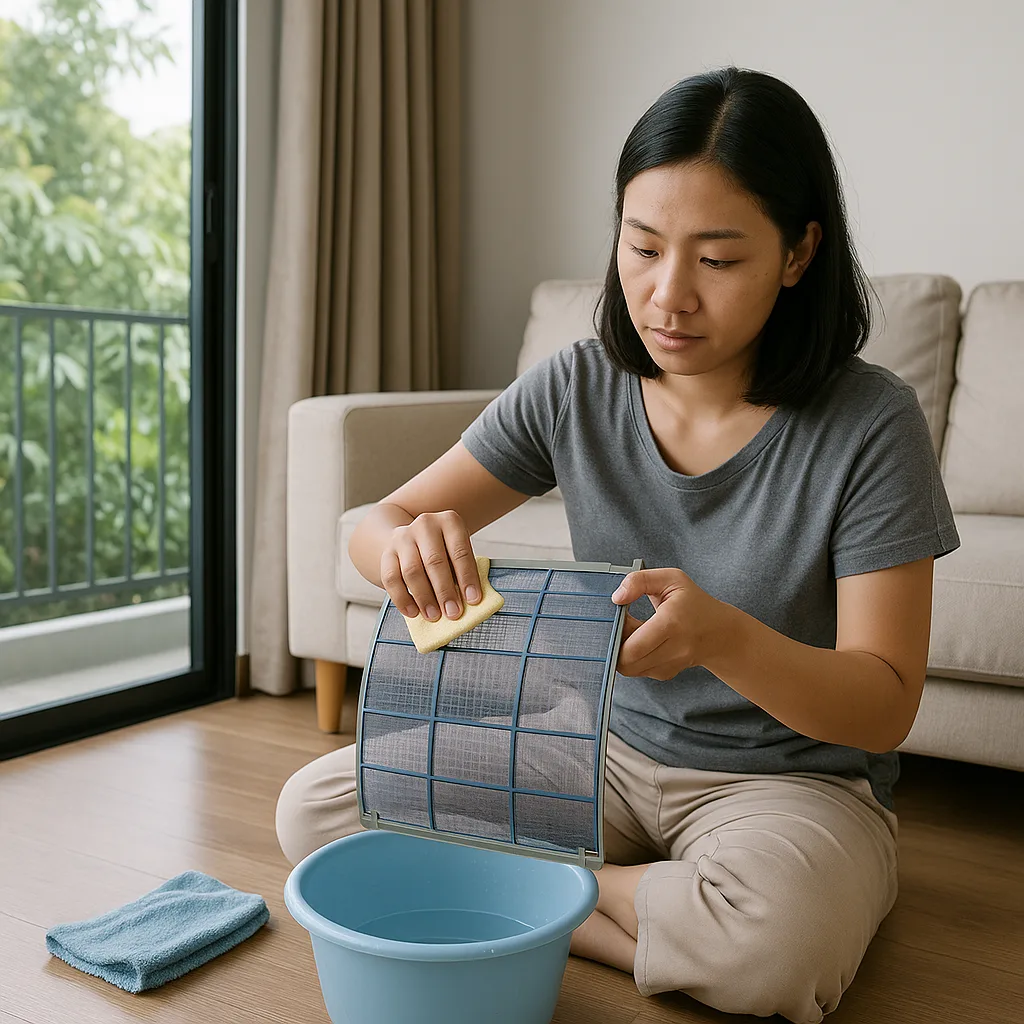
4.1 Clean / Wash the Filter
- Turn off power.
- Open front panel.
- Remove filter(s).
- Vacuum loose dust first, then rinse with lukewarm water. Use mild detergent if very dirty; avoid harsh chemicals.
- Let filter dry fully (ideally under shade) before reinstalling.
- Put back, secure cover, restore power.
Many Singapore homeowners do this monthly or bi-monthly. (airconservicing.org)
4.2 Clean the Evaporator Coil Surface (Light Dust)
- After removing the front panel, use a soft brush or blower (low pressure) to remove light dust from coil fins.
- You can use a non-acidic coil cleaner foam (approved for HVAC) per instructions, if accessible.
- Rinse gently (spray from top downward), avoid flooding the unit.
- Let it drain and dry before turning unit back on.
If coil is heavily soiled or has mold, that’s beyond DIY safe range.
4.3 Clear the Condensate Drain / Drain Pan
- The drainage pipe often gets clogged with algae, dust or slime.
- Use a wet/dry vacuum at the pipe end or open drain port to suck out blockage.
- Alternatively, pour a mild mix (e.g. diluted vinegar + water) gently to flush. Some DIYers in Singapore report 1:1 vinegar mix is used cautiously. (Facebook)
- Ensure water flows all the way through.
4.4 Clean Exterior / Outdoor Condenser (if accessible)
- Turn off power.
- Remove debris, leaves, or obstruction around the unit.
- Gently vacuum or brush the condenser fins; rinse with low-pressure hose (avoid high-pressure spray that bends fins). (Carrier)
- Straighten slightly bent fins using a fin comb.
- Check that there is adequate clearance (at least 30–50 cm) around the unit for airflow.
5. When DIY Isn’t Enough — Call a Technician
Here are red flags and tasks you should not DIY; call a trained AC tech (e.g. ACX) instead:
| Situation / Symptom | Why You Should Call Tech | Risk / Complexity |
|---|---|---|
| Cooling weak despite clean filter | Could be refrigerant leak, compressor issue, coil blocked deep | Needs pressure testing & specialist tools |
| Strange noises (humming, grinding) | Motor or fan bearing problem | Requires disassembly or part replacement |
| Electrical faults (tripping breaker, sparking) | Wiring or control circuit issue | Danger of shock or fire |
| Cold evaporator freezing over | Could be airflow, refrigerant or sensor issue | Requires diagnosis |
| Persistent foul or mold smell | Mold deep inside or drain line contamination | Needs full cleaning / chemical wash |
| Leaks around the indoor unit or wet patches on wall/ceiling | Could be broken drain pan, blocked drain, cracked piping | Needs internal inspection |
| Gas line / refrigerant work | Highly regulated and technically complex | Must be handled by licensed technician |
| Warranty constraints | Many warranties require periodic professional servicing | DIY may void coverage |
As one user on a Singapore forum put it: “Any problem related to the electrical system or refrigerant gas will have to be fixed by the technician. If you don’t know how to do these you may permanently damage the aircon unit or harm yourself.” (Reddit)
Also, if the unit has been neglected for long, oil or residue may have built up; a tech can do chemical washing and full internal cleaning beyond DIY reach.
6. Suggested Frequency & Tips for Singapore Homes
- Filter cleaning / washing: every 1–2 months (more often if dusty, pets, cooking)
- Drain pipe check / flush: every 3–4 months
- Light coil brushing / dust removal: every 6 months
- Full servicing / chemical wash: once or twice a year
- Technician inspection: at least annually, or more often in heavy-use environments
Tips:
- Keep indoor environment as dust-free as possible (vacuuming, air purifiers) to reduce load on AC.
- Avoid placing big scent diffusers or sprays near the air intake—residue risks.
- Document your DIY cleaning dates; when a tech arrives, they can see what’s been done and what still needs.
7. Step-by-Step Summary (DIY Flow)
- Power off the system at breaker.
- Remove and clean filter (vacuum + rinse).
- Open front cover; gently brush or vacuum coil surface.
- Apply approved coil foam if needed (follow product instructions).
- Rinse carefully; let drain fully.
- Clear condensate drain (vacuum or flush).
- Reassemble; switch power back.
- Test operation; check for leaks, sound, airflow.
If at any step you meet resistance, heavy grime, chemical smell, or wiring issues, stop and call a technician.
8. Benefits & Risks of DIY vs Professional
DIY Pros:
- Cost savings
- Increased control / visibility
- Frequent maintenance helps reduce big issues
DIY Risks:
- Damaging fins, circuits, or internal parts
- Improper chemical use
- Voiding manufacturer warranty
- Missing underlying issues
Professional Pros:
- Deep cleaning, chemical wash, refrigerant check
- Proper tools and safety gear
- Ability to detect early faults
- Service record helps with warranty
Professional Cons:
- Cost
- Scheduling / lead time
Best practice: DIY for light maintenance; professionals for deep or complex work.
9. Local Example: What Homeowners in Singapore Do
Several Singapore residents share in forums:
“Cleaning the filter is easy … drain pipe blockage prevented by pouring dilute vinegar … beyond that call pros.” (Reddit)
“I clean the filter myself … but any deeper work I’d call someone.” (Reddit)
From local services: some providers recommend getting a tech visit every 6–12 months, especially for chemical wash and internal coil servicing. (thebetterguys.sg)
It’s a balance: frequent DIY maintenance stretches the interval between tech visits, but doesn’t replace them.
10. Conclusion
Doing basic cleaning yourself—filters, coils, drain line—can prolong your aircon’s life, maintain cooling efficiency, and reduce costs. But you must be cautious: turn off power, use gentle tools and chemicals, and stop before you cross into risky tasks. When symptoms worsen or internal parts are involved, call a professional technician (like ACX) to handle the deep work safely.